Illuminating my interior.
 |
| My XB before installing all the lights. |
One of the main difficulties I have with my 2006 Scion XB is the lack of lighting on the inside. The one little dome light from the factory really doesnt help. But it was better than nothing. Until the bulb stopped working right. The I had no light at all inside.
Since I use this vehicle for my mobile bartending business. ( www.bartendervince.com ), I need light to load my equipment after parties. It is usually dark and we are anxious to pack up and leave to get home and sleep. Since the car has so much space/volume inside, I wanted bright light to make sure visibility was awesome.
So after some digging on Amazon.com I came across these
uxcell® DC 12V C White 46 LED Dome Roof Ceiling Interior Lights aftermarket interior dome lights. The reviews about them are mostly positive. After a few months of back and forth I decided to order 5 of them. I wanted 1 over each passenger, and them 1 in the luggage area. That area was the darkest of all. Each light has a 3 way switch - off, on, and door switch on.
So overall the installation was pretty simple. I started off by installing each light into the location I wanted them. Then I dropped the headliner so I could run the wiring and make the connections. Then it was a matter of testing the lights to make sure it all worked right. Then I put the headliner back in and sealed it all up. Thats sounds quick and easy but allow about a whole day to do it.
 |
| The back of the light assembly and the mount. |
First I installed all the lights on the headliner.
 |
| I marked the spot to drill by poking a hole through the head liner. |
 |
| Using the mounting bracket to place my mark. |
 |
| Using a half in drill bit to drill a hole in the liner for the wires to go through. |
 |
| Using the 4 screws provided to secure the mounting bracket. I made each screw just snug tight. Don't over do it or you will strip them out. When mounting the bracket remember the hooks point away from the switch of the light when it is installed. Otherwise you might have the switch on the wrong side you wanted it on. |
 |
| Run the wires through. When you install the light to the bracket, you will need to slide it toward you to feel the snap so the light housing locks in place. |
 |
| Installed light. |
 |
| Driver and passenger lights. |
 |
| Both rear seat lights. |
After all the lights were in place, I lowered the head liner so I could run all the wires and make the connections.
 |
| Remove the side pillar plastic. I used a 14mm socket to remove the bolt for the seatbelt anchor. |
 |
| The bottom of the plastic has this hook. slid it out, don't yank it out. |
 |
| Pull off the weather stripping too. This pulls right off around the doors. |
 |
| The rear window panels pull off. they only have these clips holding them in. |
 |
| At the back pull the head liner off these plastic holders. |
 |
| The rear plastic pieces interlock into the lower panels with these tabs. Don't break them. Remember this when putting it all back together so they all lock in nicely. |
 |
There are 4 buttons that hold up the head liner at the back luggage area.
|
 |
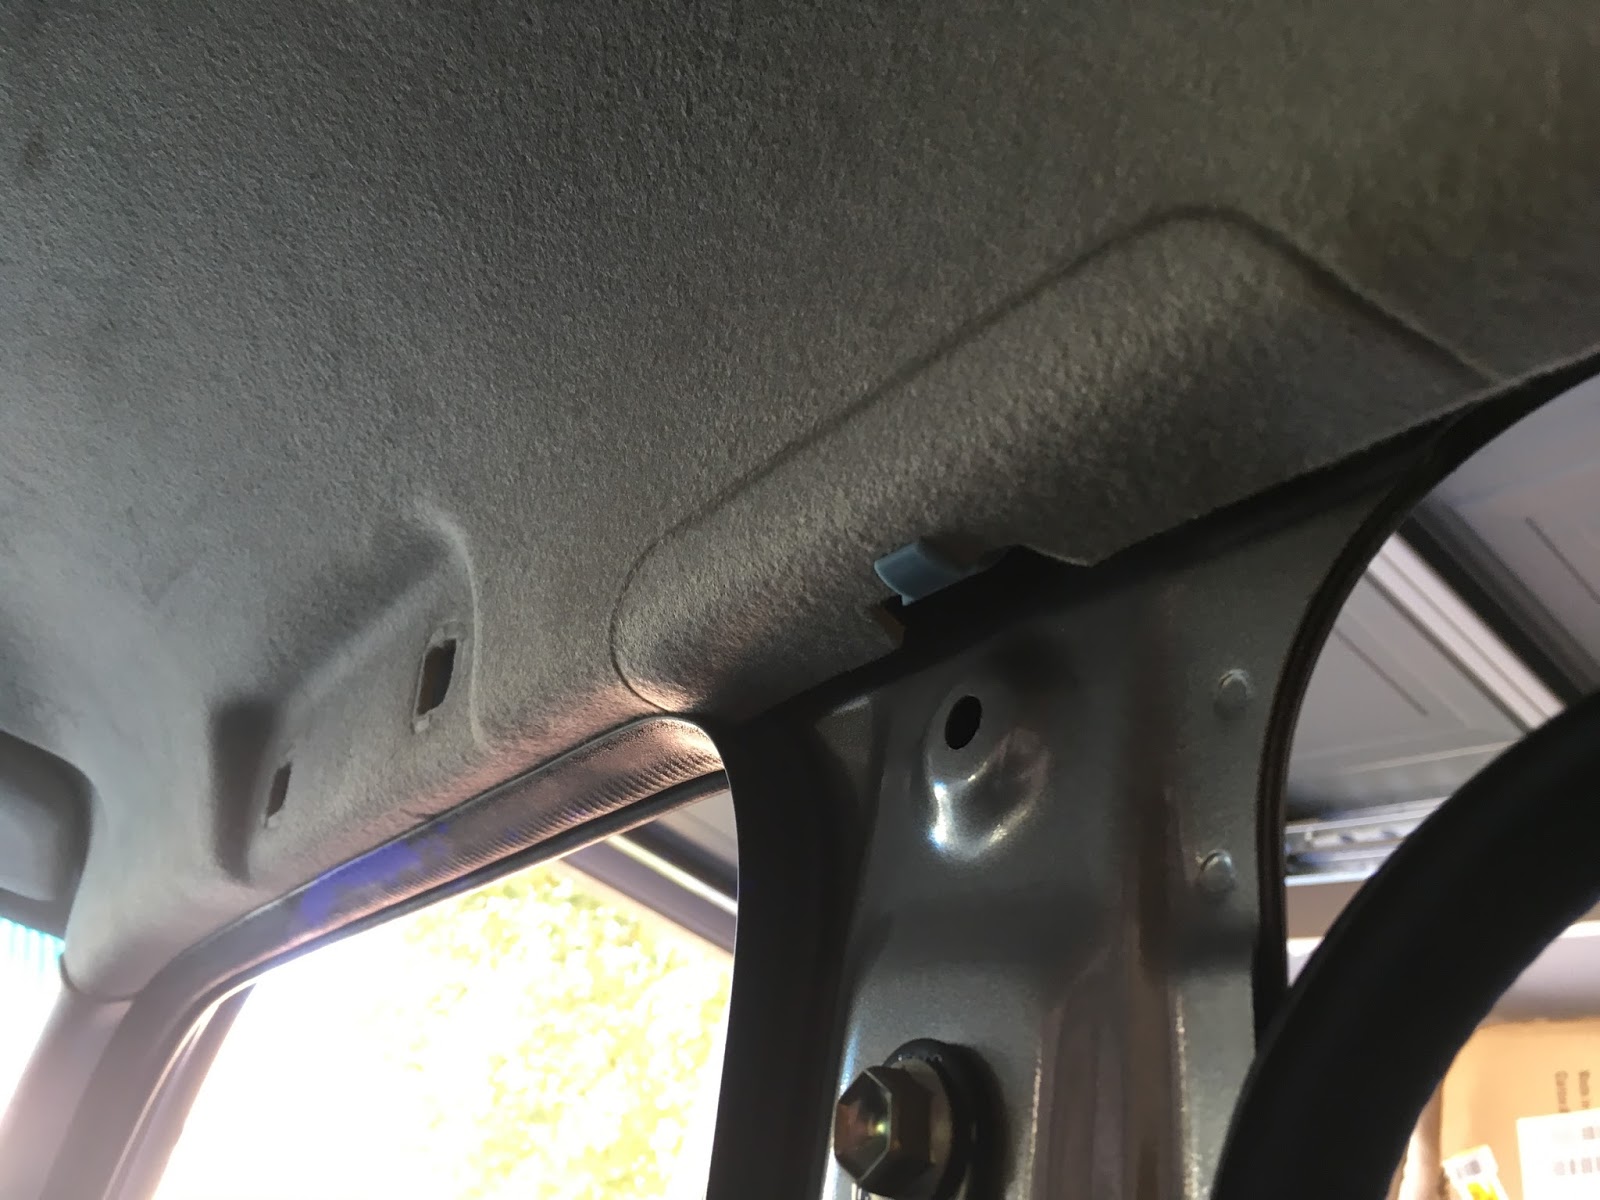
| Be sure to remove these buttons holding the rear of the headliner in place. |
 |
| remove the handles and pull the headliner from these plastic pieces to get it down. |
 |
| I pulled off these front pillar plastic pieces, but realistically if you let headliner hang you don't need them out. |
 |
| The headliner hanging down ready to run wiring. |
 |
| the headliner |
 |
| the factory dome light wires. |
 |
| How the roof looks. |
 |
| How I connected the wire, the wires, stripped back enough to twist. |
 |
| I folded over my 18 gauge wire. |
 |
| Wrapped electrical tape to isolate the wires and provide strain relief for the tiny light wire. |
 |
| On the left is the wire from the light, on the right is a 18 gauge wire I'm using. |
 |
| I ran each light's wire set through the dome light hole. |
 |
| I then connected the power wires, the ground wires, and the door switch wires with these wire nuts for home electrical work. |
 |
| I tested the lights by using alligator clips and connecting to the factory dome light assembly. |
 |
| I didn't have a 3rd color wire to run, so I put yellow electrical tape on the black wire I used to connect the door light switch to the new dome lights. |
 |
| Here is the layout of my 5 lights I added in. |
 |
| I taped down he wires to the headliner so it stayed neat. I was sure to allow enough slack so if I ever had to remove a dome light, I could pull the light off and some wire and disconnect it. |
 |
| I used some wire taps to connect to the factory loom. Left side is positive, the right side is the door ground. |
 |
| Re installing the side plastic panels. |
 |
| Running the negative ground side through the housing. |
 |
| I ran the negative wire through the factory dome light housing, and put a spade terminal on the end to ground the manual on switch of all he lights. |
After installing them I decided to measure how much output they have. I used an app for my Iphone that measures the Lumen. I placed my Iphone on my center arm rest between my front seats and took measurements. In the dark, with just the drivers light on, I measured 22 lumen. With both front seat lights on I measured 49 Lumen.
 |
| Both front seat lights. |
 |
| Drivers seat light only. |
My opinion.
I really like the brightness of these lights. Honestly using 5 was overkill, but I couldn't realistically determine how bright they actually were till I had them in my hand. I think 2 would have been fine. 1 in between the front seats, and 1 in between the rear seats. Maybe a 3rd in the trunk area, but that would be optional. However I love how well lit my interior is at night when loading up my car.
Tools used in this post -
- 14mm socket with ratchet, for the seat belt anchors.
- 10mm socket and ratchet to remove the grab handles in the headliner.
- Electrical tape.
- Volt/ohm meter
- Test light
- #2 phillips screw driver
- 1/2 inch drill bit
- Cordless electric drill.
Parts used in this post -
- Uxcell DC dome lights
- 18 gauge wire, black and red, and if you can a yellow. Your need about 2 rolls of each.
FYI, I get a small commission from the links in this post if you click them and purchase something at no added cost to you.
Let me know if you have any questions or would like more detail.
Thanks for reading.