In this post I'm showing you the unboxing of my strut boots, the spring compressor I purchased, the removal and replacement of the struts and boots.
I didn't have a spring compressor. I debated on just taking the strut assemblies down to the local shop to have them do the work, but then I decided I would rather buy the tool and do the work at home. So I purchased
ABN MacPherson Strut Spring Compressor
.
Lastly, I also order dust boot covers since I assumed my factory one will need replacement. I ordered.
KYB SB102 Strut Boot
kit from Amazon.com too. I originally ordered 2 of them, however once they arrived and checked them, one of the boots was wrong. So I contacted amazon.com and they ship a replacement next day delivery. That's freaking awesome. They are a hard plastic materials not rubber like the factory. I don't know if they will hold up as long but we will see.
I'm showing pictures of the unboxing of my replacement boot below.
 |
| Received my amazon replacement boot. |
 |
| My replacement boot. |
 |
| Part number 102 for my 2006 Scion XB |
 |
| Inside the box is a plastic boot and a foam material bump stop. |
 |
| You have to assemble the two pieces. I used a little grease to help. |
 |
| A little grease around this shoulder. |
 |
| To assemble I slid the bump stop through the larger opening at the bottom. |
 |
| Push the bump stop all the way through. |
 |
| Next you have to pul the bump stop till the should sits in the groove at the top. Careful because it is easy to pull the stop all the way through. |
 |
| Be sure it is seated al the way around. |
 |
| I took some flat black paint and painted the white bump stop. However later I learned you don have to do that. More to come. |
Here is the spring compressor I purchased from amazon.com.
ABN MacPherson Strut Spring Compressor. This thing worked great. It has some great features for the great price. The parts that "grab" the spring coils are wide and get good surface area. I really like that. They feel thick and heave material so I want scared they would snap off or bend. The threaded rod is thick and has a 1/2 in drive square in the end for a ratchet to connect to. That was a great feature. I also loved the pin that you slide over the coils to help keep the spring in the tool while setting it up.
I started on the Drivers side strut. Mine had 208k miles on them and definitely could tell they were bad. All the bumps in the road were harsh and I got lots of road vibration through the cabin.
I started by putting the drivers side on a jack stand and removing the wheel.
 |
| I loosened up the 12mm top bolts. |
 |
| I removed the Speed sensor wire from the clip. |
 |
| I removed the 14mm bolt holding the Brake line and speed sensor wire bracket. |
 |
| Next I removed the 19mm nuts and bolts from the strut and knuckle. |
 |
| Removed the nuts from the top and remove the strut assembly. |
 |
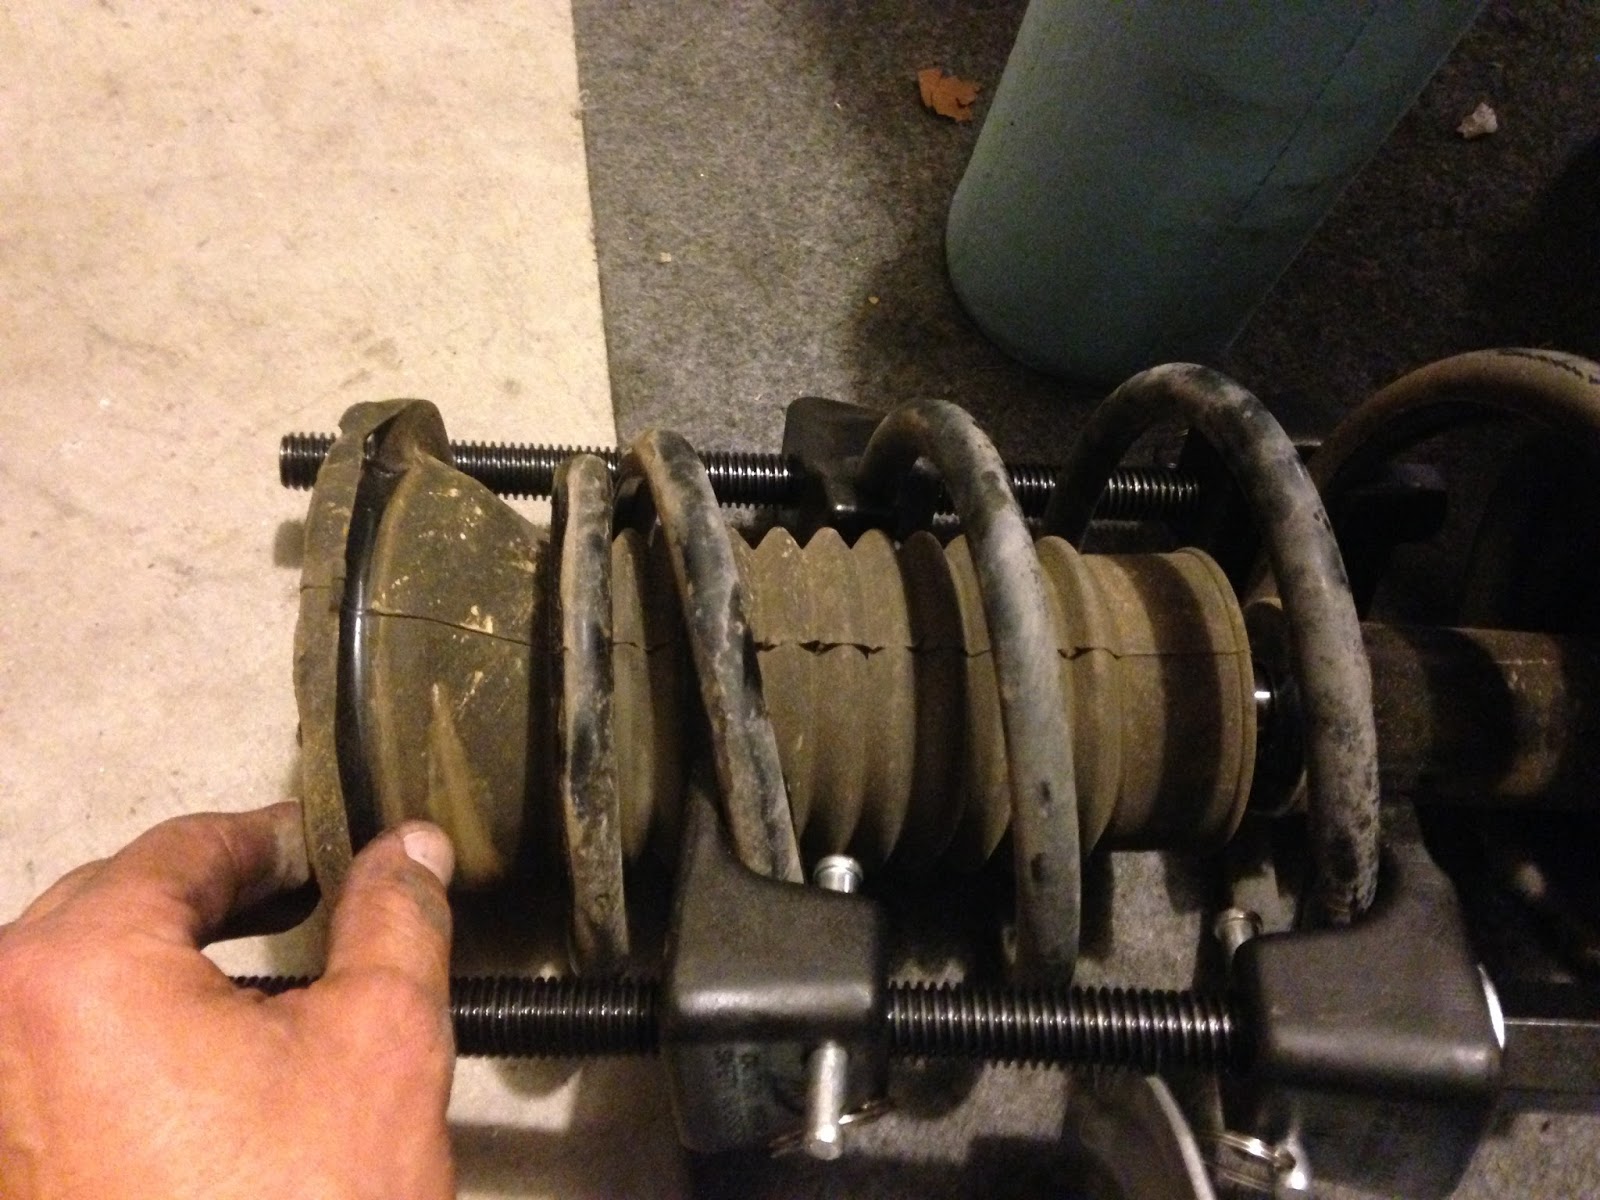
| The full assembly |
 |
| Installing the spring compressor and using the pins to hold it in place while tightening the clamp. |
 |
| Using a 1/2in drive ratchet to tighten each side 10 turns at a time. |
 |
| Spring compressed and tension released from the top cap. |
 |
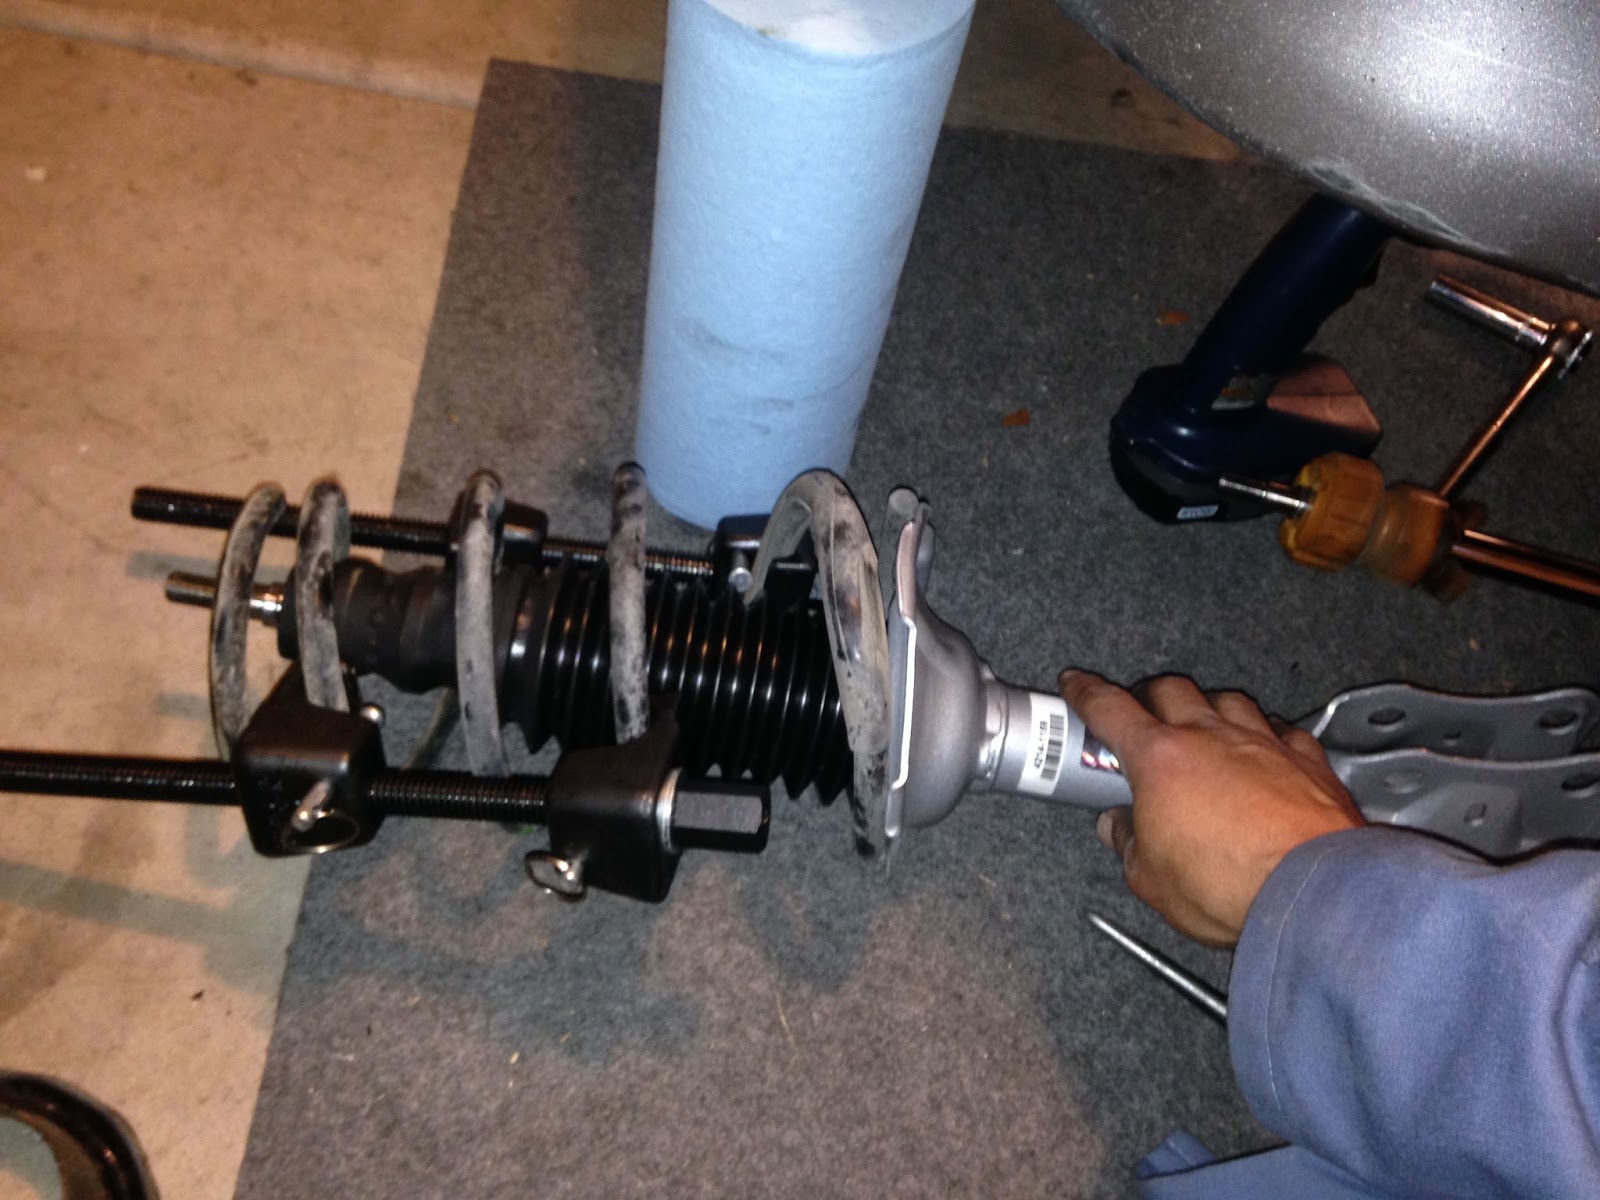
| The new strut next to the old assembly. The new one was a match. Brackets in the right positions, and overall spring seat was correct. |
 |
| Removed the factory 17mm nut. |
 |
| Removed the top bearing. |
 |
| Removed the top plate. |
 |
| What it looks like inside. |
 |
| Removing the original boot and spring cushion. |
 |
| The factory bump stop was broken and beat up bad. |
 |
| Comparing the new boot with the old one. |
 |
| Installed the new boot and stop. |
 |
| Boot seated all the way down. |
 |
| The old boot won't go over the new one so I cut off the old boot to keep the top spring cushion. |
 |
| The old spring seat will go over the new parts like this. |
 |
| Pulling out the old strut. |
 |
| Installing the new strut and making sure the spring goes in the right spot on the strut. |
 |
| Putting the spring cushion on and aligning the pieces. |
 |
| The hole in the top spring plate has 2 flat sides. Be sure the spring is compressed enough that the plate goes all the way down the mate the the piston rod of the strut. You need to hold this plate to prevent the piston rod from spinning when tightening the nut on top. |
 |
| Set the plate in place. |
 |
| The spring cushion has nubs on the back, be sure they go through the proper holes for alignment. |
 |
| Be sure the spring is positioned correctly. |
 |
| Install the top bearing and new nut supplied with the strut. |
 |
| The completed assembly. |
 |
| Release tension from the spring equally on both sides and remove the tool. |
 |
| Re-install the top nut dust cover. |
 |
| Install the assembly to the vehicle. |
|
| Hand tighten the top nuts. |
 |
| Install the bottom bolts and nuts. |
 |
| Be sure to remove the wire clip from the old strut and install it to the new one. |
 |
| Bottom bolts and nuts installed and tightened. |
 |
| Install the brake hose and speed sensor brackets. |
 |
| The finished product. Installed and ready to go. |
 |
| Something I noticed was that I cut the factory boot cover too short . I should have left more to cover the bump stop better. I left more when I did the Passenger side and it looked better. See the next picture. |
 |
| Passenger side assembly. I left more of the factory boot to better cover the new bump stop. Much better this time. |
 |
| Looks better leaving more of the factory original boot to cover the bump stop. |
Overall it took me about 2-2.5 hours to complete. Keep in mind I also took all the pictures so I'm sure I could have done it quicker too.
I have driven for a day or two now and really noticed a change in how the car handles. The acceleration feels better and the stopping feels better. This si because the new shocks and struts help to firm up the suspension. The rear shocks help put the torque to the road by preventing so much squat. The from help braking by preventing so much front end dip. I also noticed the turns feel firmer and less body roll. Road noise is a little less and I don't bottom out in dips and driving into my driveway. The shocks have really made a noticeable difference and I like them so far.
Tools used in this post -
 |
| Tools: 12mm wrench, 14mm socket, 17mm socket, 19mm socket, impact gun, 1/2 ratchet, 3/8 ratchet, pick, pryer, razor blade,
ABN MacPherson Strut Spring Compressor |
Parts used in this post -
Let me know if you have any questions or would like more detail.
Thanks for reading.
 as being the best price for the full set. I was a little hesitant but decided to try them due to the budget constraints.


Another great write up! Your information gave me enough confidence to try this myself....so it's much appreciated.
ReplyDeleteI performed this on my 05 Scion xB this weekend. I live in Syracuse NY, so the majority of my issues came from rusted on nuts and bolts. I pussed out and purchased entirely new strut assemblies from Amazon -- $140 for the pair.
The only other place I struggled was lining up the new strut mount to the existing steering knuckle. I realized during the install that I should have loosened the sway bar/stabilizer end links to allow for more space for the strut assembly to line up. I had one hell of a time getting everything lined up on the reinstall. I ended up putting way too much down pressure on the front CV shaft. I hope I didn't mess anything up...especially with the alignment :/
Nevertheless, this write up was a real time saver....thank you for it!
Fantastic write up thank you
ReplyDelete